Studio 4A
Overview / Reminder
- Work in groups of 2-4. This studio must be done in a group.
- Studios are a time to explore the material and refine your understanding.
- You should NOT “divide and conquer” to complete all of the studio. The time is meant for improving your understanding.
- You should ensure that everyone in your group contributes to and benefits from the work.
Artifacts for this studio
Complete the code and questions.
Studio Setup
Caution!
Carefully follow the steps below! Errors can be difficult to fix!
- Everyone should log in to GitHub using the ID you want to use for the course.
- Designate one member of your group to “create a team”.
- The designated “group creator”
Team creation
The designated “group creator” and only that person should:
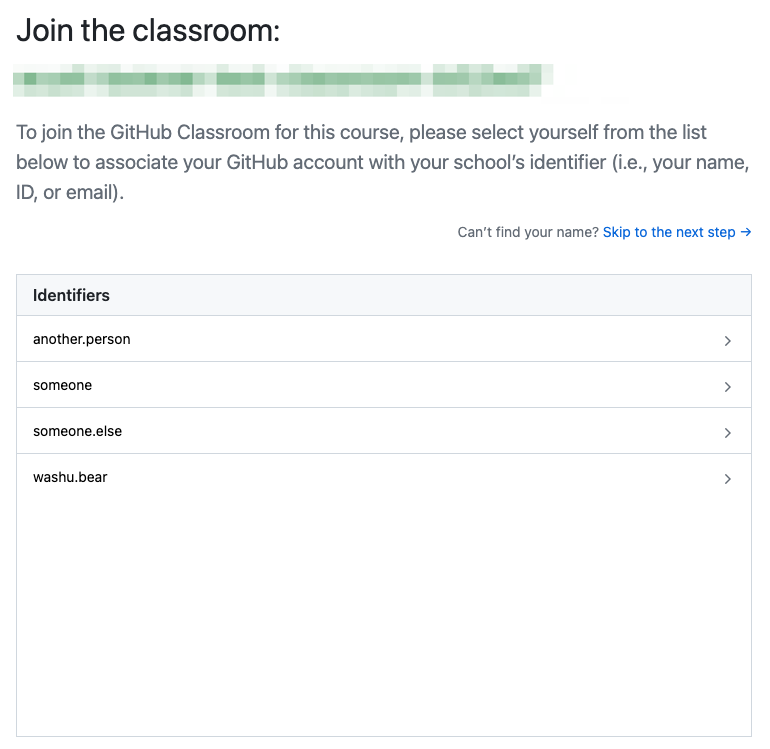
- On their computer (where they are logged in to GitHub), navigate to link
- Select their WUSTL Key from the list
- They should create a team name that includes last name of each member of your team separated by dashes, like
hu-perez-smithif the last names of your group members are Hu, Perez, and Smith.
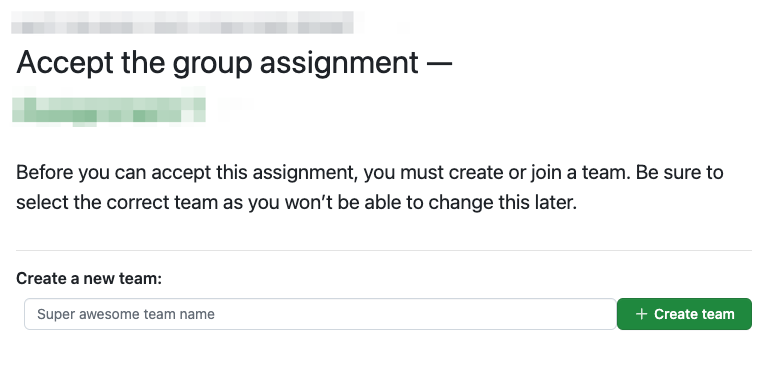
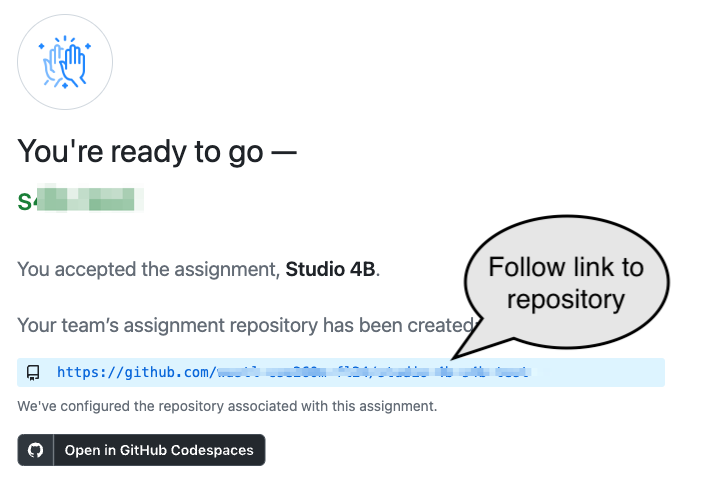
- They should “Accept the assignment”.
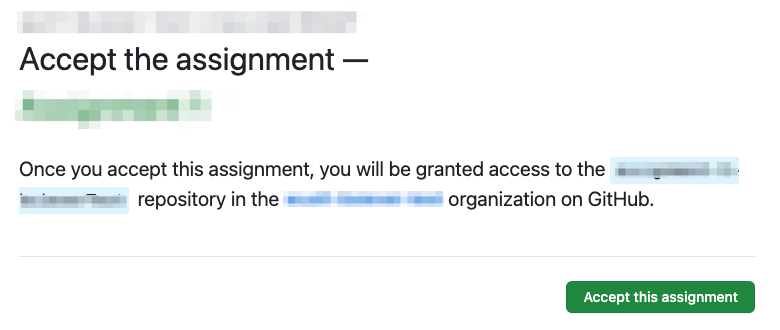
- The “group creator” should follow the link to the new repository for the group:
Other group members
Now that the group is created, everyone else should join it. Each person (on their computer, where they are logged in to GitHub), should:
- Navigate to link
- Select their WUSTL Key from the list.
- Select and join the group that was created in the last step.
Start up
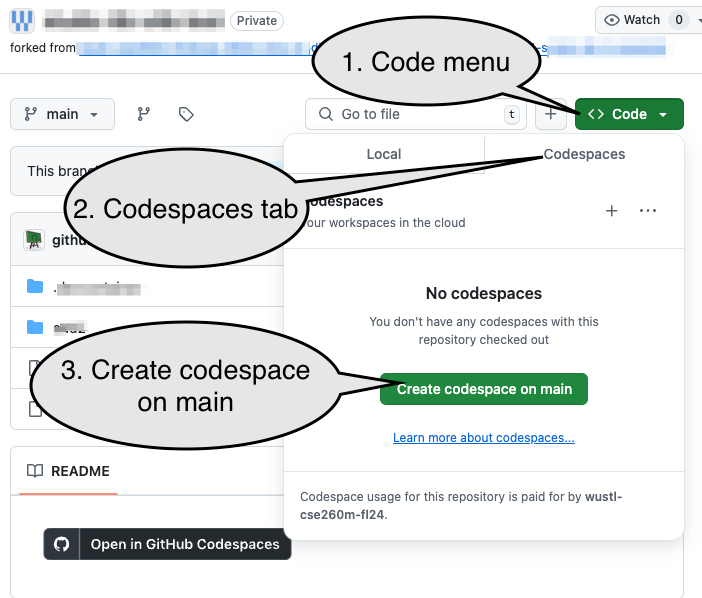
- We’ll be using a Codespace for today’s studio. You should work from a single computer. (Perhaps the “Group creator”)
- Create a code space from the repository:
Overview of Window
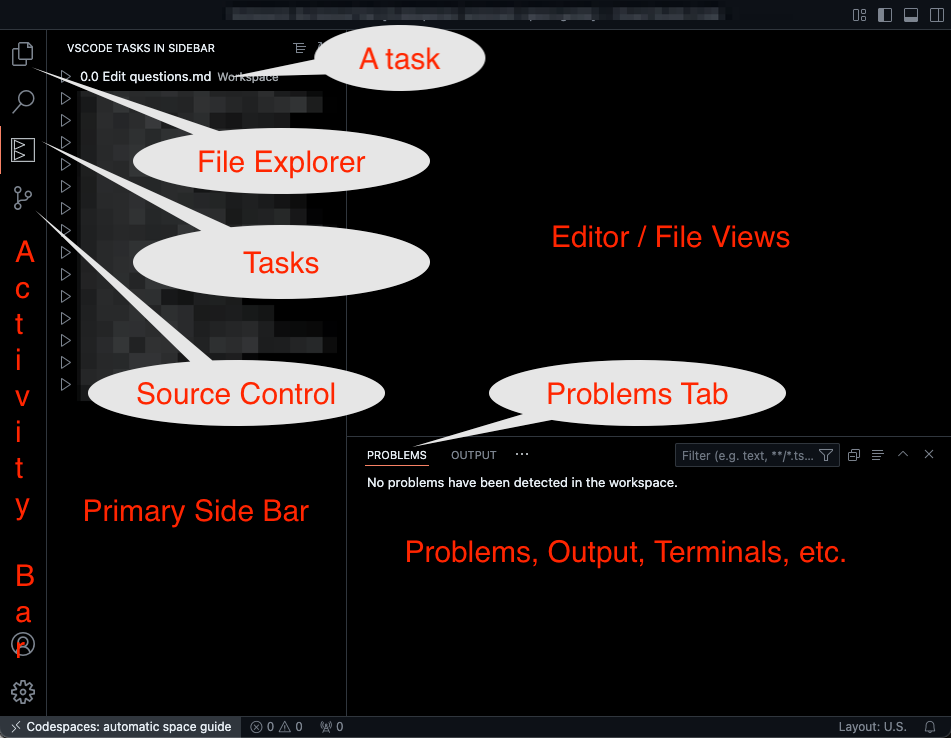
The primary areas of interest in the Codespace are:
- Activity Bar on the far left. Selecting an Activity will either hide or change the contents of the Primary Side Bar. The image shows the Tasks view. The three most common activity views in this course will be:
- The Tasks view (for workflows on assignments).
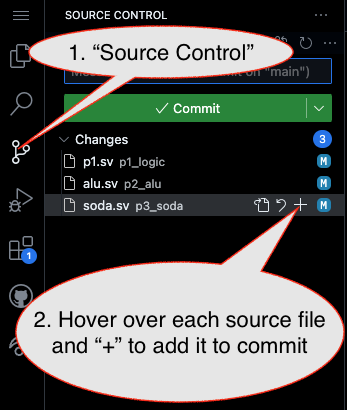
- The Source Control view (for submitting code).
- The File Explorer (selecting and browsing files).
- Editor and File views
- The Problems panel within the bottom set of views and panels.
Artifacts for this studio
When done you must “commit and push” all completed work (questions.md and all changed .sv files) to GitHub. This will both allow you to share work among group members and serve as the submission for today.
Markdown
Run the 0.0 Edit questions.md task (Click the VSCode Tasks icon on the side bar ( ) and then the task’s name).
Many of our remaining assignments will include some questions in a “MarkDown” (.md) file. Markdown is a common markup language and can be used to create formatted text files using only basic text. Replace the TODO line following the Q1.1 line as described in questions.md.
Review how to create lists in MarkDown and complete Q1.2.
As a Markup language, MarkDown is really meant to create a web-friendly view of the text with additional styling. Preview your questions.md with the styling by opening the MarkDown Preview. On macOS this is done with Command+shift+V (macOS) or Control+shift+V (Windows). Note that your cursor has to be in the .md text window and the window has to be active.
Review other features of MarkDown MarkDown and answer Q1.3
Full Adder: Revisited
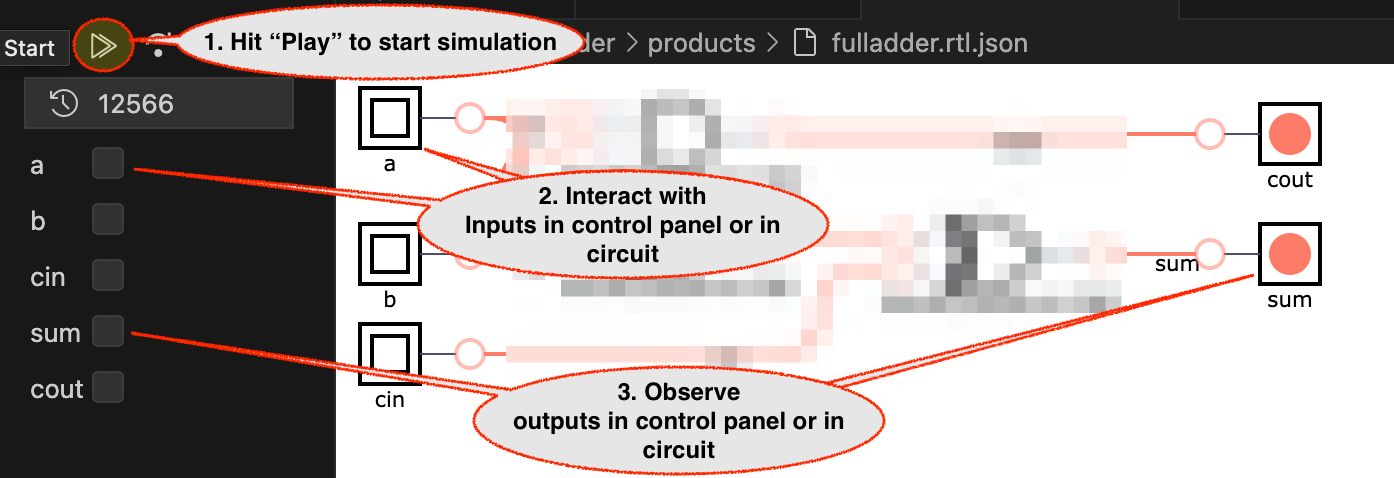
Recall that a “full adder” does the general purpose addition needed for multi-digit numbers: it adds two addends and a carry-in.
Run Task 2.1 (Simulate fulladder.sv). Does is add correctly? Explain your findings in Q2.1
Wiki Wisdom
Wikipedia provides one common boolean algebra equation for a full adder, that combines $A$, $B$, and $C_{in}$ to product a sum, $S$, and carry, $C_{out}$:
$$S = A \oplus B \oplus C_{in} $$ $$C_{out} = (A \cdot B) + (C_{in} \cdot (A \oplus B)) $$
Does the depicted circuit match these equations? Explain any discrepencies in Q2.2.1
Use task 2.2 (Edit fulladder.sv) to edit the SystemVerilog model for the full adder (.sv for a SystemVerilog file). Review the code and confirm that it matches the equations given or correct it if needed. If you make changes, see if they impact your tests from part 2.1. (It may help to review Verilog operators. The author’s slides for our text include a summary as do the course slides)
Caution!
The simulator window does not automatically update as you change the Verilog files. Be sure to re-run the simulation task.
In some cases you may also need to close the simulator tab to ensure it refreshes properly.
Make mistakes
Experiment to see how the environment behaves when there’s a single syntax error in the file (wrong symbols, missing punctuation, misspellings, etc. ). Repeat with a few different types of error. Answer Q2.3.1
(That is, make a single mistake, wait a few seconds to try to observe an issue, undo it and repeat with a different error)
Errors may not be shown in ways that you have experienced in other tools. Watch the Problems tab for problems, but be aware that there can be delays before it updates and it can occasionally be out-of-sync with your work.
Make more than one mistake at a time and Answer Q2.3.2
Re-run the Simulation task with one or more errors. What happens? Try a few variations and report your findings in Q2.3.3
Caution!
You may need to close the simulation window and restart it (re-run the task) to observe changes.
Undo all errors and return the fulladder to a working, correct implementation.
Test Benches
Run the fulladder testbench task, which will run a test file meant to confirm the fulladder works. Answer Q2.4.1.
If they run correctly (indpendend of whether parts behave correctly), testbenches will open their results in a waveform viewer panel where you can select devices (Scopes) and signals within the devices (Variables) to examine. Experiment with the waveform view of the testbench and determine how the inputs, a, b, and cin, change over time. Explain your findings via Q2.4.2.
Caution!
You need to close the testbench waveform tab to ensure it refreshes properly.
The testbench window does not automatically update as you change the Verilog files. Be sure to re-run the testbench task.
Structure & Verilog
The prior model was a behavioral model of a full adder. Now use tasks 3.1-3.3 to complete a structural model of the full adder by precisely describing the parts and connections between parts. As before, a partial implementation has already been provided.
Primitive gates can be modeled with the format: type(output, inputs...). For example, a 3-input or gate could be modeled with or(output, a, b, c); or with a unique name for the instance of the or gate, like or gate1(out, a, b, c);.
Complete Q3.1
Hardware and Synthesis
The hardware kit comes with an UPduino, which includes a Field-Programmable Gate Array. This is essentially a device that contains many digital logic devices that can perform complex functiosn (the “Gate Array”) and can be reconfigured (reprogrammed in the field).
We will be:
- Using the Codespace to “synthesize” a hardware-description language model of a digital device to a format called a bitstream. The “synthesis” process will take your work in Verilog files and figure out how to represent it on the programmable parts in the UPduino. The bitstream that’s created is the blueprint for how the UPduino’s internal parts need to be configure.
- The Codespace can’t interact directly with your UPduino, but a browser with WebUSB support, like Chrome or Edge, can. The Codespace will launch a new webpage that will open in your web browser. That page will be used to send the bitstream to your UPduino.
Follow the directions in FPGA Programming to light the green LED on the UPduino
Follow the directions in FPGA Programming to configure the LED & Key board and test it
Use Task 4.3 to test your behavioral fulladder on the hardware! It will use buttons, LEDs, and displays as follows:
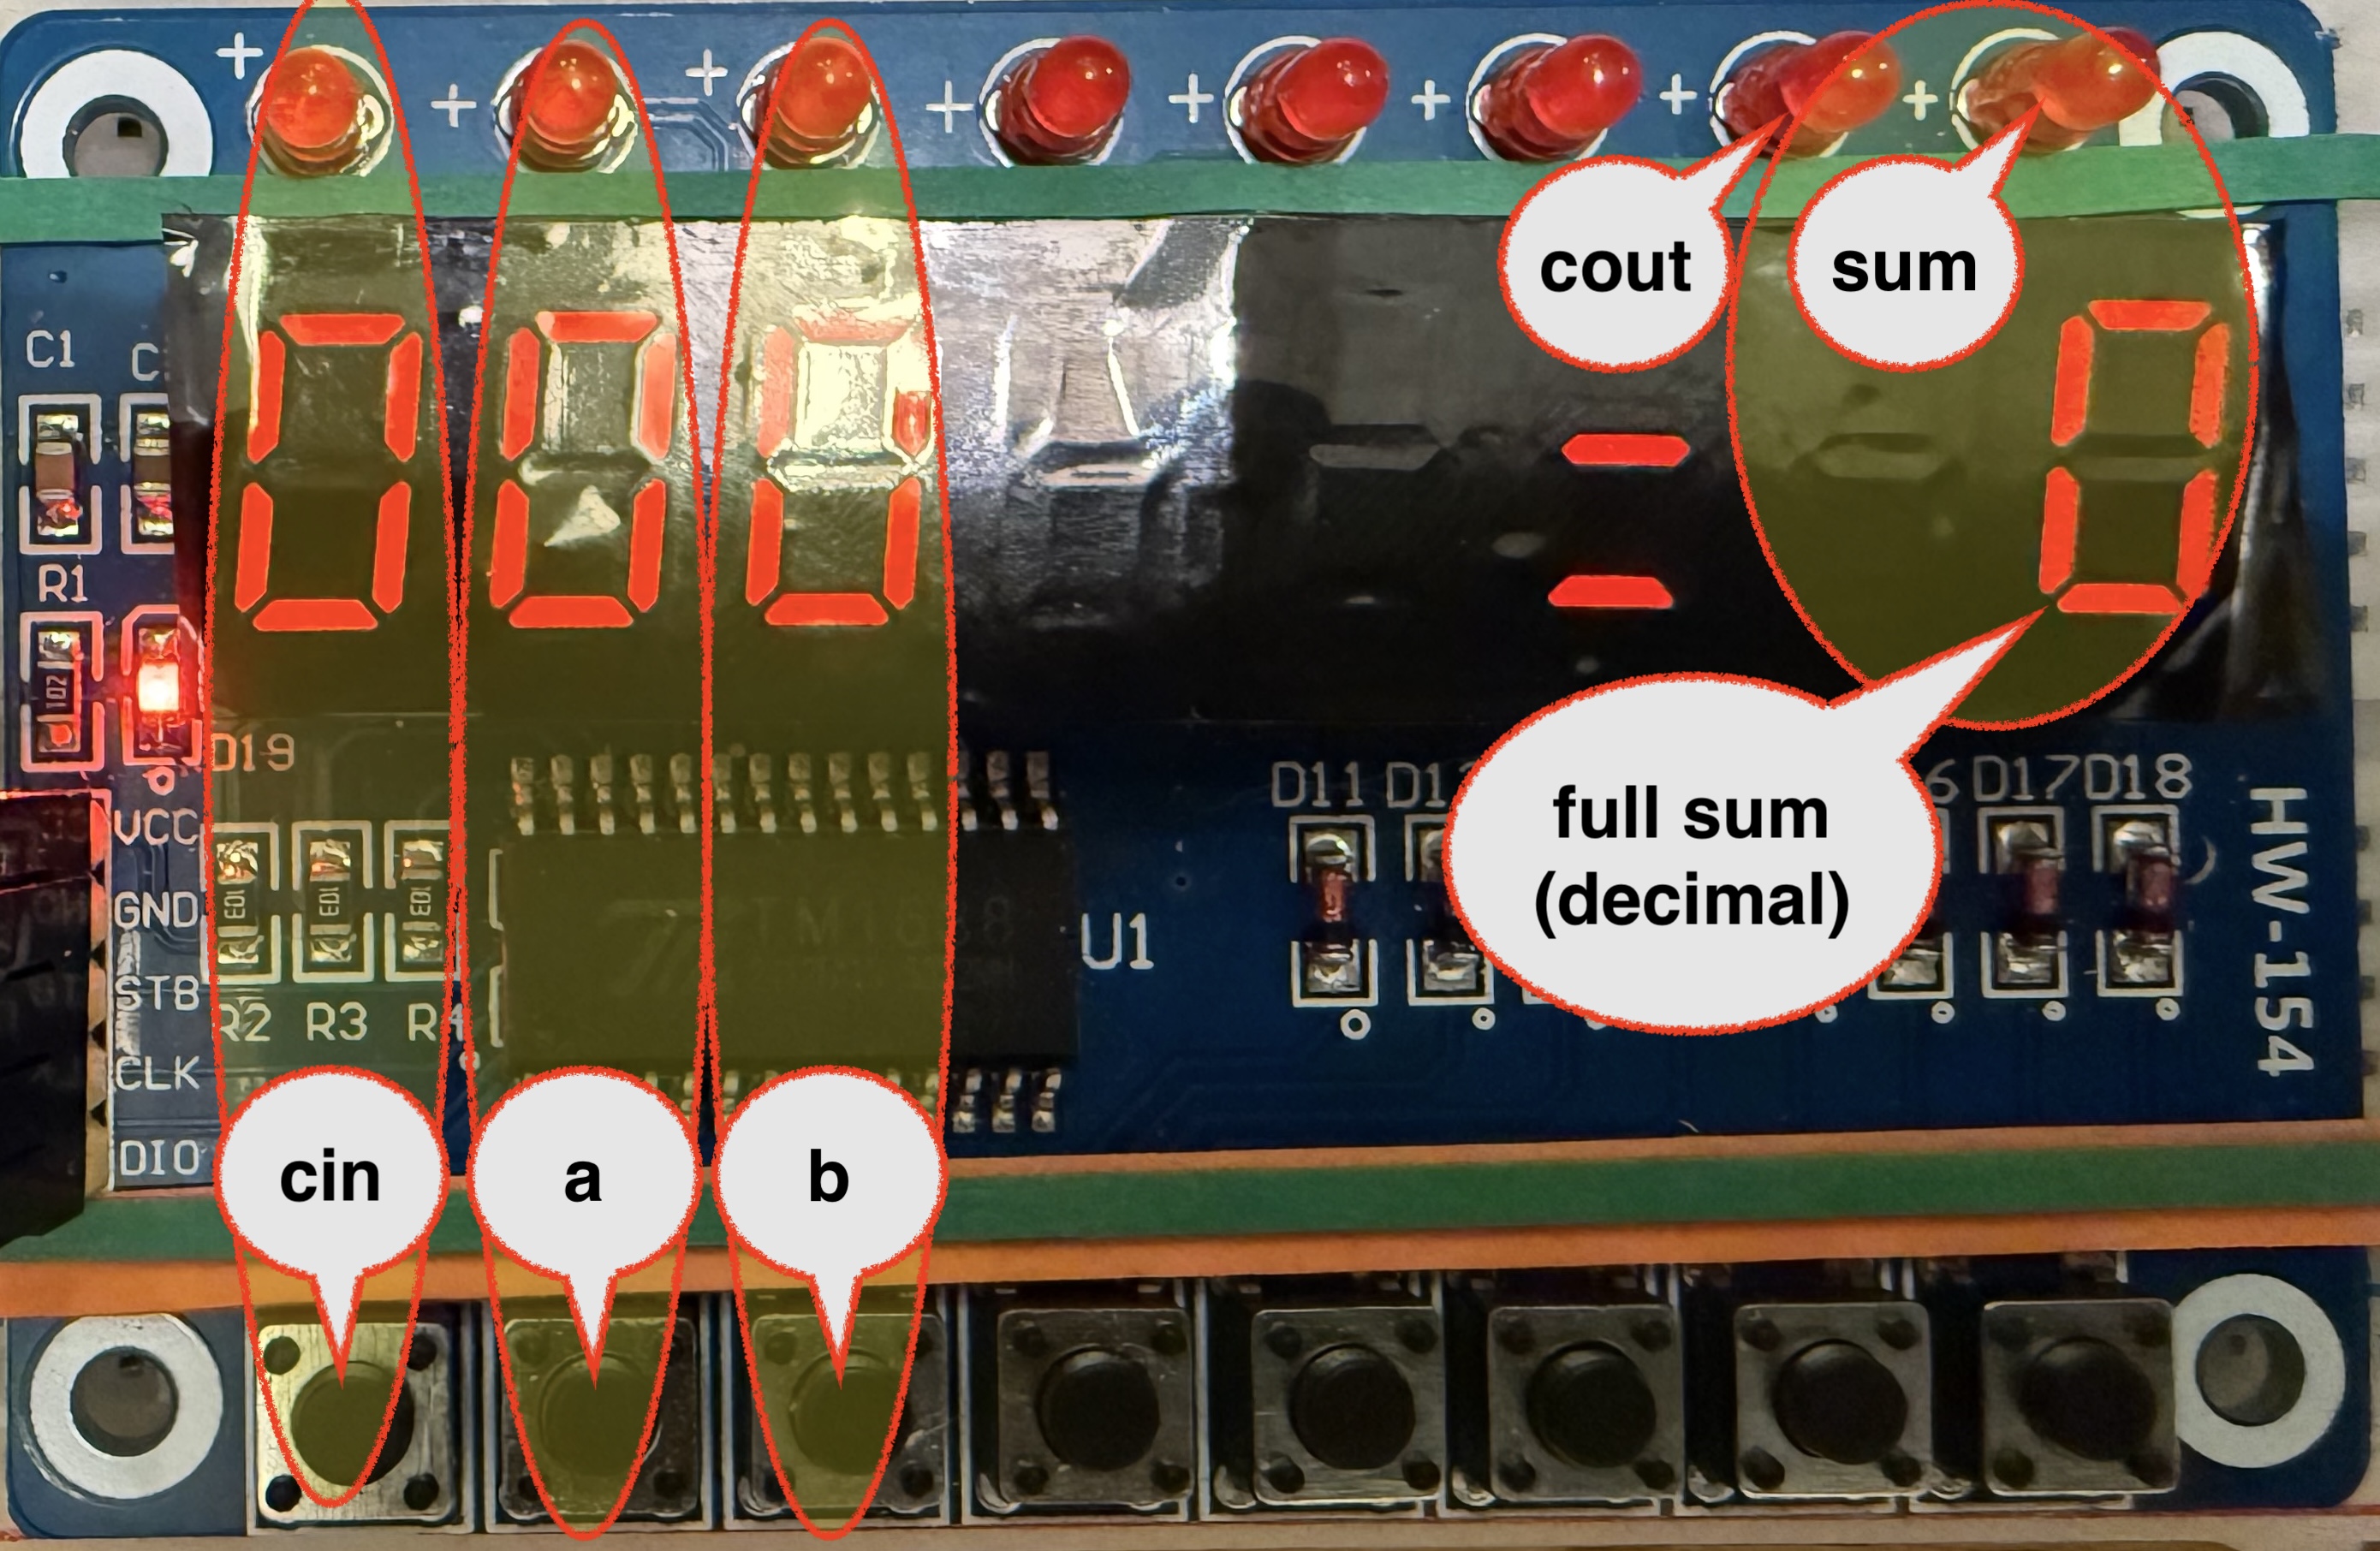
Please be aware that many boards have bad LEDs, which should be marked on the board. Consequently, the corresponding LEDs may not ever turn on when a button is pressed but the 7-segment displays should still behave correctly.
Submission / End-of-class: Commit And Push
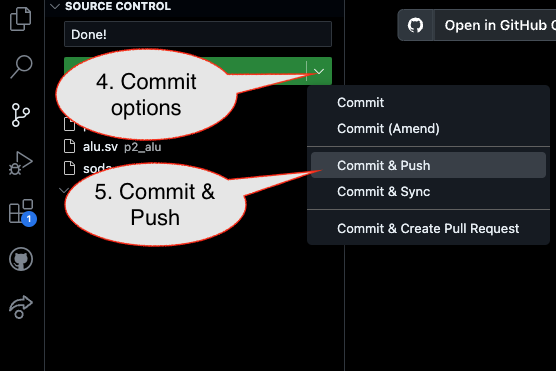
1. First, be sure to commit and push files to GitHub (as shown in studio)
1.1
1.2

Caution!
Failure to type in a commit message will cause VSCode to open a window to enter the message (in the editor area) and the Source Control pane will appear to be stuck (a waiting animation) until you type in a message and close the message pane.
1.3
2. Then go to GitHub.com and confirm the updates are on GitHub
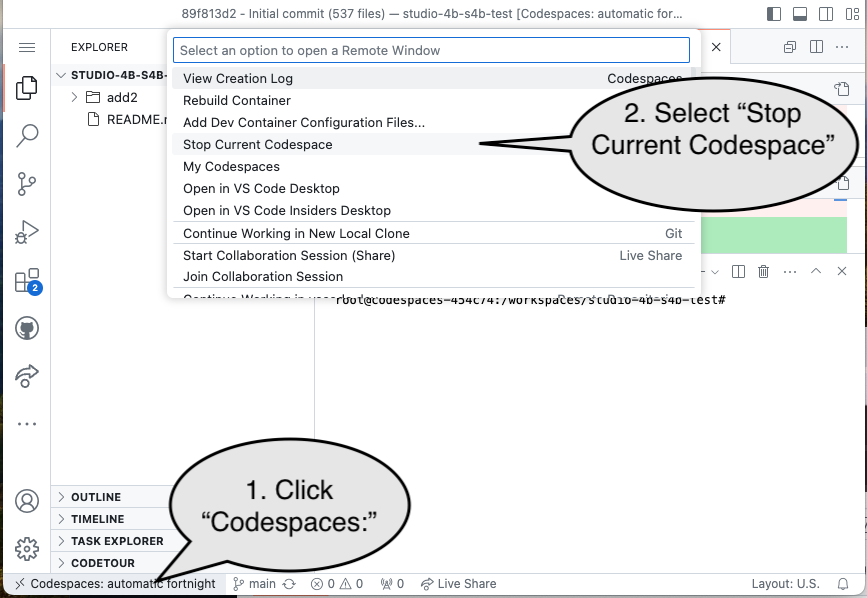
End of Studio: Stop the Codespace
Caution!
Be sure to “stop” your Codespace. You have approximately 60 hours of Codespace time per month. Codespaces often run for ~!5 minutes extra if tabs are just closed.